Boss Kit Fitment Guide: How to Choose the Right Steering Wheel Hub for Your Car
Date Posted:19 March 2026
A steering wheel boss kit is a vital connection in any race car or street build. Get it right, and you get a crisp steering feel, and comfortable driver positioning. Get it wrong, and you will deal with a crooked wheel, broken clock springs, or a rim sitting right against your chest.
Founded in August 2005 by racer Ryan McLeod, Racer Industries was built to solve a clear problem in Australian motorsport: eliminating out-of-stock parts, inflated prices, and guesswork with genuine, track-proven gear.
This guide breaks down spline fitting, PCD bolt patterns, hub depth options, and step-by-step setup. View a Boss kit downloadable PDF guide.
What a steering wheel boss kit does
A boss kit (or hub adaptor) joins your car's steering column to an aftermarket steering wheel. Mounted between the steering shaft and the wheel, it adapts factory column splines to match standard bolt patterns. It also holds your indicator cancelling pins and routes the horn grounding circuit.
A boss kit is purely a mounting coupler and spacer. It will not fix a worn steering rack or bad alignment, but it sets up the mechanical base for your steering controls.
How it works
Your factory steering column ends in a tapered shaft cut with splines and keyways. The center hole of the boss kit has matching internal splines. When you tighten the central column nut, these tapered splines lock together to create a solid joint with zero play.
The front face of the boss kit features a flat flange. This flange has drilled holes cut to a set Pitch Circle Diameter (PCD) to mount standard 6-bolt or 3-bolt aftermarket wheels.
Key Fitment Factors: Splines, Height, and PCD
1. Spline Count & Column Architecture
Every car maker uses specific column shaft diameters and spline counts. Standard GM columns and aftermarket setups (like Flaming River or Ididit) use a common 36-spline pattern. Indicator cancellation setups also vary. Some columns use 12 o'clock or 9 o'clock pins, while others use plastic extension collars or cast rear slots. If your car has a collapsible steering column, you must use a column-specific adaptor to keep safety features working on impact.
2. Hub Construction & Height (Standard, Short, & Dished)
Pick your hub height based on your seating setup and accessories:
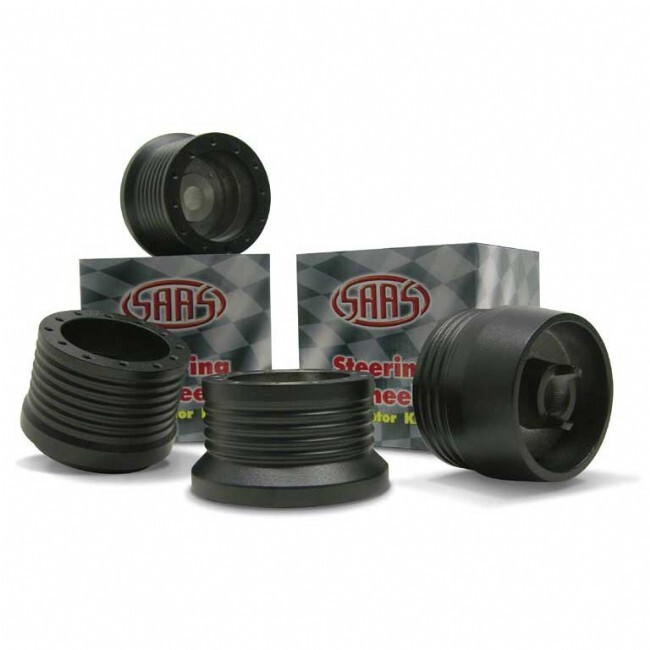
- Cast Alloy vs. Billet Machined: Cast hubs offer lightweight, reliable fitment for track and street use. Solid billet hubs (like SAAS BBK series units) give extra strength and clean cosmetics for heavy-duty racing.
- Standard Boss Kits (75–100mm deep): Built for flat or shallow wheels. They keep factory stalk reach and arm angles comfortable.
- Short Boss Kits (25–40mm deep): Needed when fitting a quick-release hub (like Works Bell or NRG). This stops the wheel from sitting too close to the driver.
- Dished Wheel Spacing: Running a deep dished wheel (dish depth over 80mm) requires a shorter boss kit or removing rear spacer collars to keep the rim clear of your chest. You can also add a 40mm extension spacer to push a flat wheel closer to you.
3. PCD Bolt Patterns (6x70mm vs. 6x74mm)
Aftermarket steering wheels use standardised bolt circle sizes, measured diagonally across opposite holes:
- 6x70mm PCD: The common standard for Momo, Sparco, OMP, Velo, and SAAS wheels.
- 6x74mm PCD: Standard for Nardi and Personal wheels.
- Dual-Pattern (12-Hole) Hubs: Feature both 6x70mm and 6x74mm hole patterns on one flange.
- 3-Hole GT/Grant Adapters: Adapter plates that let 3-bolt American-style wheels fit onto standard 6-bolt boss kits.
Hardware Specifications
|
Parameter |
Standard Specification |
|
Momo / Sparco / OMP Bolt Pattern |
6 x 70mm PCD |
|
Nardi / Personal Bolt Pattern |
6 x 74mm PCD |
|
Flange Screw Threads |
M5 x 0.8 pitch countersunk socket cap screws |
|
Central Column Nut Torque |
35–45 ft-lb / 47–61 Nm (refer to vehicle manual) |
|
M5 Wheel Fastener Torque |
4–5 ft-lb / 5.5–7 Nm |
How to install a steering wheel boss kit
Set your front wheels straight ahead before starting.
Removal & Inspection
- Disconnect the negative battery terminal. On airbag cars, wait 15 minutes to let the backup power clear.
- Remove the horn button or factory airbag module.
- Unplug the horn and airbag wires.
- Mark the shaft position relative to the factory hub using a paint pen.
- Loosen the central column nut with a breaker bar and socket. Important: Spin the nut back until it sits flush with the shaft end, but leave it threaded on by 2–3 turns.
- Pull and wiggle the steering wheel until it pops off the shaft taper. The loose nut stops the wheel from hitting you. Remove the nut and wheel.
Installing the Boss Kit
- Route horn wiring (and airbag resistor plugs) through the wire feed hole in the hub.
- Align the internal splines of the boss kit with your mark on the column.
- Slide the hub onto the shaft. Check that indicator pins, clock spring drive lugs, or rear slots fit without binding.
- Thread the central column nut back onto the shaft. Torque it to factory shop manual specs (usually 35–45 ft-lb / 47–61 Nm).
- On track cars with removed airbags, wire an inline resistor across the airbag plug to clear dash lights.
- Connect the horn spade terminal from the boss kit ground ring to your horn button.
- Place your wheel on the boss kit flange. Start all six M5 socket screws by hand, then tighten them evenly in a cross pattern to 4–5 ft-lb (5.5–7 Nm).
How to trim alignment and horn tracking
- Straight-Line Drive Test: Drive at low speed on a flat road before snapping the horn button in.
- Spline Adjustment: If the wheel spokes sit crooked while driving straight, pull over and remove the main nut. Slide the boss kit off, move it over by one spline tooth, and re-test.
- Horn Ground Check: Make sure the brass ring on the rear of the hub keeps sliding contact against the column ground pin through a full 360-degree turn.
Important notes before you drive
A few key rules to remember:
- Do not force splines: Hub splines must slide on by hand. Forcing an incorrect fit will strip the soft aluminium hub bore and ruin column threads.
- Airbag & Street Rules: Boss kits built for factory airbag cars (like VT–VZ Commodores or BA–BF Falcons) are strictly for Off-Road / Competition Use Only. Removing airbags on road cars violates safety laws.
- Prevent Clock Spring Damage: On cars retaining factory clock springs, align the drive slots with the boss pins before tightening the main nut. Crushing the plastic housing will break internal wiring.
Replacing a damaged boss kit
A hub with loose fitment, stripped bolt threads, cracked metal, or a worn horn contact ring must be replaced right away. Swap in a new hub by matching spline count, checking pin layout, and using the torque steps above.
Steering wheel boss kit FAQs
How do I measure my steering shaft spline count?
Count the individual teeth around the tip of your steering column shaft using a pick or paint pen.
Can I run a dished wheel with a standard boss kit?
Yes, but a deep dished wheel (>80mm) on a standard hub brings the rim closer to your body. If reach feels cramped, switch to a short boss kit or remove rear spacer collars.
Why won't my indicators cancel after installing a boss kit?
Indicator cancellation needs rear drive pins or slots on the boss kit. If these pins are missing, bent, or miss the column cam, you must reset indicators manually after turns.
What is the difference between cast alloy and billet boss kits?
Cast hubs offer lightweight, affordable fitment for road and track builds. Billet hubs (like SAAS BBK units) add extra strength and clean styling for high-load racing.